

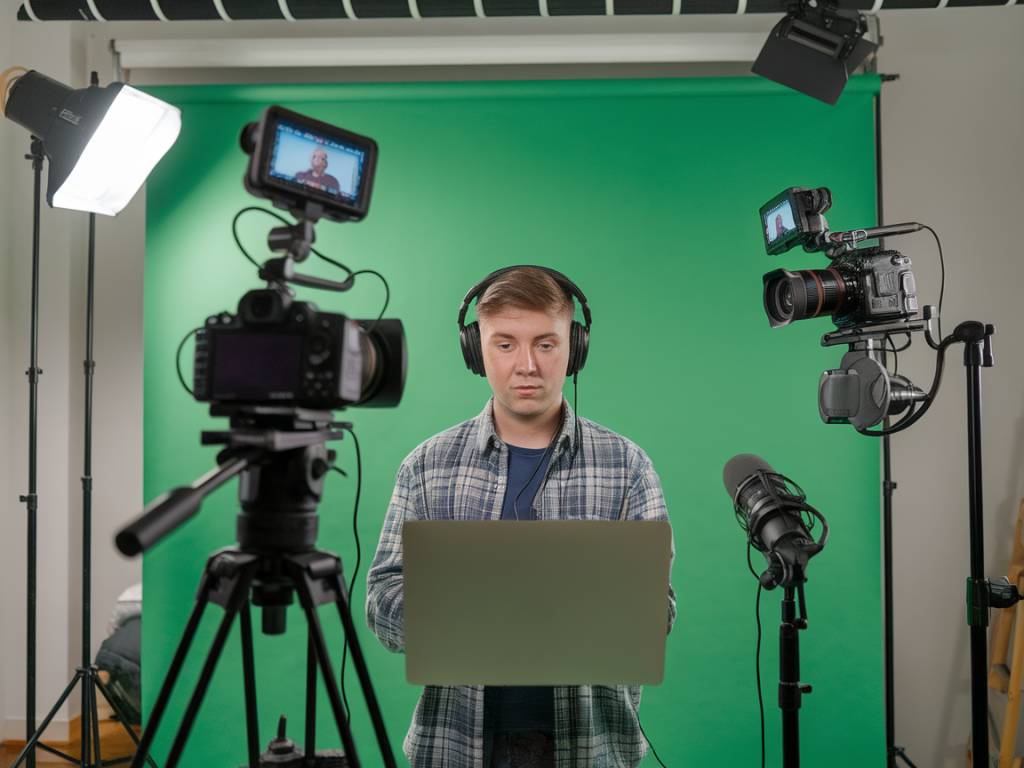
As live streaming continues to surge in popularity, many content creators are exploring ways to enhance their broadcasts by incorporating multiple cameras. Setting up a multi-camera livestream can seem daunting, especially for beginners. However, with the right guidance and equipment, anyone can create a dynamic and professional-looking stream. In this article, I will walk you through the key steps to set up a multi-camera livestream, from choosing the right equipment to optimizing your broadcast.
Choosing the Right Cameras
The first step in setting up a multi-camera livestream is selecting the appropriate cameras. Your choice will largely depend on your budget and the quality you wish to achieve.
For beginners, I recommend starting with a mix of webcams and entry-level DSLRs or mirrorless cameras. Here are some popular options:
- Webcams: Affordable and easy to use, webcams like the Logitech C920 offer decent video quality and are perfect for stationary shots.
- DSLRs/Mirrorless Cameras: If you want higher quality video and more control over your shot composition, cameras like the Canon EOS M50 or Sony Alpha a6000 are great choices.
When selecting cameras, ensure they have an HDMI output, which will make the next steps easier. Additionally, verify that your chosen cameras are compatible with your live streaming software.
Setting Up Your Capture Cards
To send your camera feeds to your computer, you will need capture cards. A capture card processes the video signal from your camera and sends it to your computer via USB or PCIe.
Here are a few recommended capture cards:
- Elgato Cam Link 4K: A popular and reliable USB capture card with support for 4K resolution at 30fps.
- Blackmagic Design DeckLink Mini Recorder 4K: A PCIe capture card for those looking for higher-end options with professional features.
Ensure you have one capture card for each camera you plan to use. Connect each camera’s HDMI output to the capture card, and then connect the capture card to your computer.
Setting Up Your Streaming Software
Next, you’ll need to configure your streaming software. Many streamers opt for software like OBS Studio, Streamlabs OBS, or vMix. For beginners, OBS Studio is a great starting point because it’s free and widely supported.
To set up OBS Studio for a multi-camera livestream:
- Install OBS Studio: Download and install OBS Studio from the official website.
- Add Video Capture Devices: In OBS, click the « + » button under « Sources » and select « Video Capture Device » for each camera. Name each source appropriately (e.g., Camera 1, Camera 2).
- Select Capture Cards: After naming your source, select the corresponding capture card from the dropdown menu. Repeat this step for all cameras.
- Arrange Scenes: Create different scenes to organize your cameras. For instance, you might have one scene for a single camera shot and another for a split-screen view.
- Audio Setup: Don’t forget to add your audio sources. You can use the built-in microphone on one of the cameras, or better yet, use a separate microphone for higher audio quality.
Optimizing Your Network
Handling multiple camera streams requires a robust internet connection. A stable upload speed is crucial for ensuring a smooth broadcast. Here are a few tips to optimize your network:
- Wired Connection: Always use a wired Ethernet connection instead of Wi-Fi. This reduces latency and improves stability.
- Check Speed: Use websites like Speedtest.net to check your upload speed. Aim for at least 5 Mbps upload speed for 720p streaming and 10 Mbps for 1080p.
- Network Traffic: Minimize other network activities during your stream to ensure all bandwidth is available for your broadcast.
Lighting and Sound
Good lighting can dramatically improve the quality of your livestream. Consider investing in some budget-friendly lighting options like softbox lights or LED panels. Position the lights to reduce shadows and provide even lighting across your subjects.
For sound, external microphones generally offer better audio quality than the built-in mics on cameras. Lavalier mics, shotgun mics, or USB microphones like the Blue Yeti are excellent choices.
Testing and Troubleshooting
Before going live, thoroughly test your setup. Check the following:
- Video Quality: Ensure that all cameras are working and their feeds are clear.
- Audio Levels: Confirm that the audio levels are appropriate and there is no unwanted noise.
- Internet Connection: Run another speed test to confirm your upload speed is sufficient. If possible, conduct a private test stream to iron out any issues.
If you encounter any problems, OBS Studio has numerous online forums and support communities where you can seek help.
Going Live
Once you’re confident in your setup, it’s time to go live. Log in to your streaming platform (like YouTube, Twitch, or Facebook Live) and configure the stream settings. Copy the stream key and paste it into OBS Studio under “Settings” -> “Stream”.
Finally, hit the « Start Streaming » button in OBS Studio and monitor the stream to ensure everything is running smoothly. Interact with your audience and make any necessary adjustments in real-time.
Setting up a multi-camera livestream may seem challenging at first, but with the right equipment and a bit of practice, you can significantly elevate the quality of your broadcasts. Remember to start simple, test thoroughly, and gradually add complexity as you become more comfortable with the technology. Happy streaming!